Creating and Managing Titles
To create and manage Titles, follow this link: Titles - OTT Stream
A title page serves as the dedicated landing space for each film or series, encompassing all essential details such as original title, release date, runtime, certification, budget, revenue, popularity, language, images, videos, cast and crew information, genres, keywords, comments and reviews and the countries of origin associated with the production.

Before you upload a video on the platform, you need to create its Title page.
Title Management Interface
The Titles page allows you to manage and overview all content available on your OTT STREAM platform. This section guides you through its key features and functionalities to enable you to efficiently manage your content library and enhance your viewers' experience.
At the top of the page, you'll find a search bar to quickly find specific titles, allowing for efficient navigation through large content libraries.
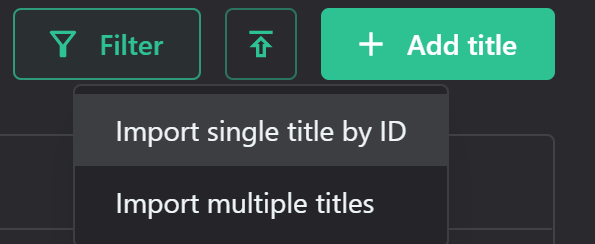
Next to it, there are three action buttons:
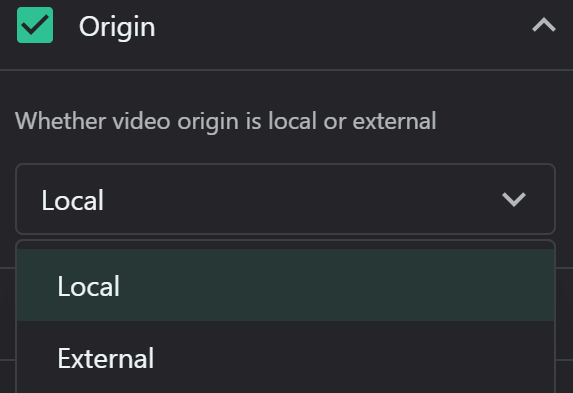
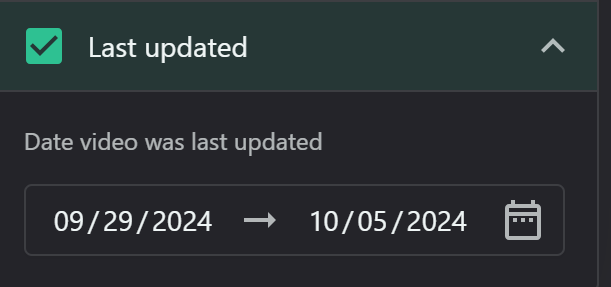
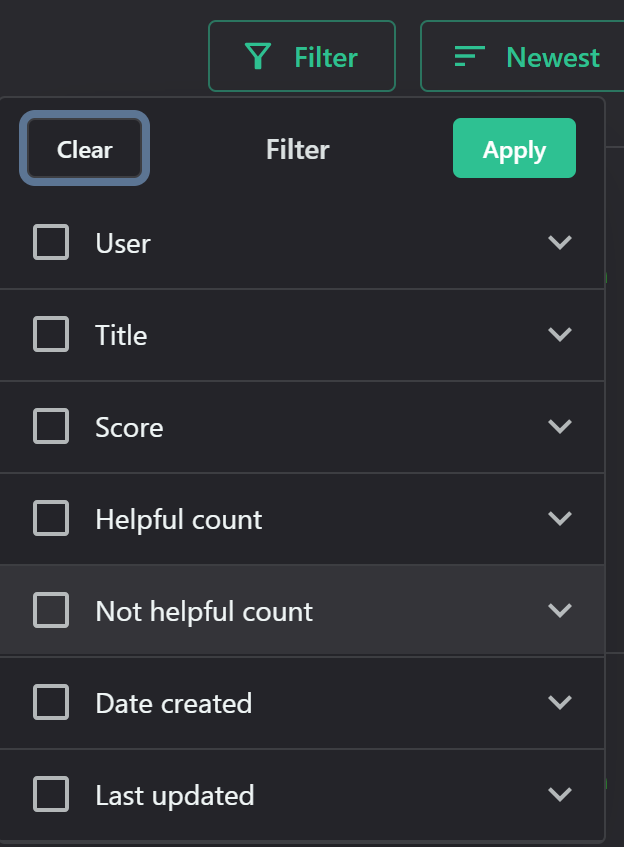
a) "Filter": Use this to refine the displayed titles based on various criteria, such as genre, release date, rating, runtime, language, countries, age rating, budget, revenue, type, views, poster, date of creation and last update.
b) "Import from TheMovieDB": Used to import single or multiple titles by ID
To upload single titles by ID, you need to select the type of the title (movie or series) and TheMovieDB ID
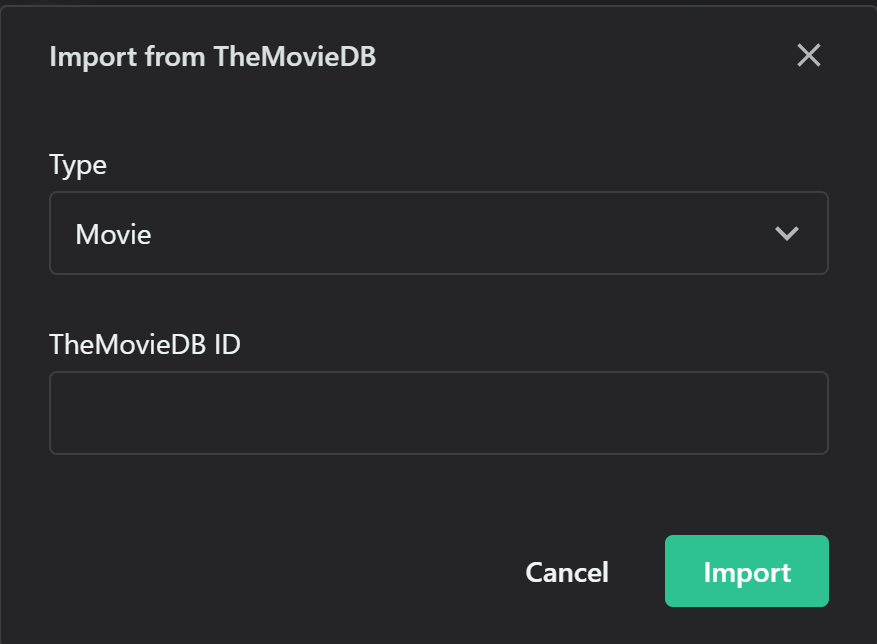
To import multiple titles from TheMovieDB, you will need to select
type (movie or series)

starting page and how many pages (20 titles per page) to import
Genre
Keywords

Language
Country
Rating
Release date
c) "Add title" (+): Click this to add new content to your library, opening a form where you can input all necessary details for a new title. The detailed process will be described later in this section.
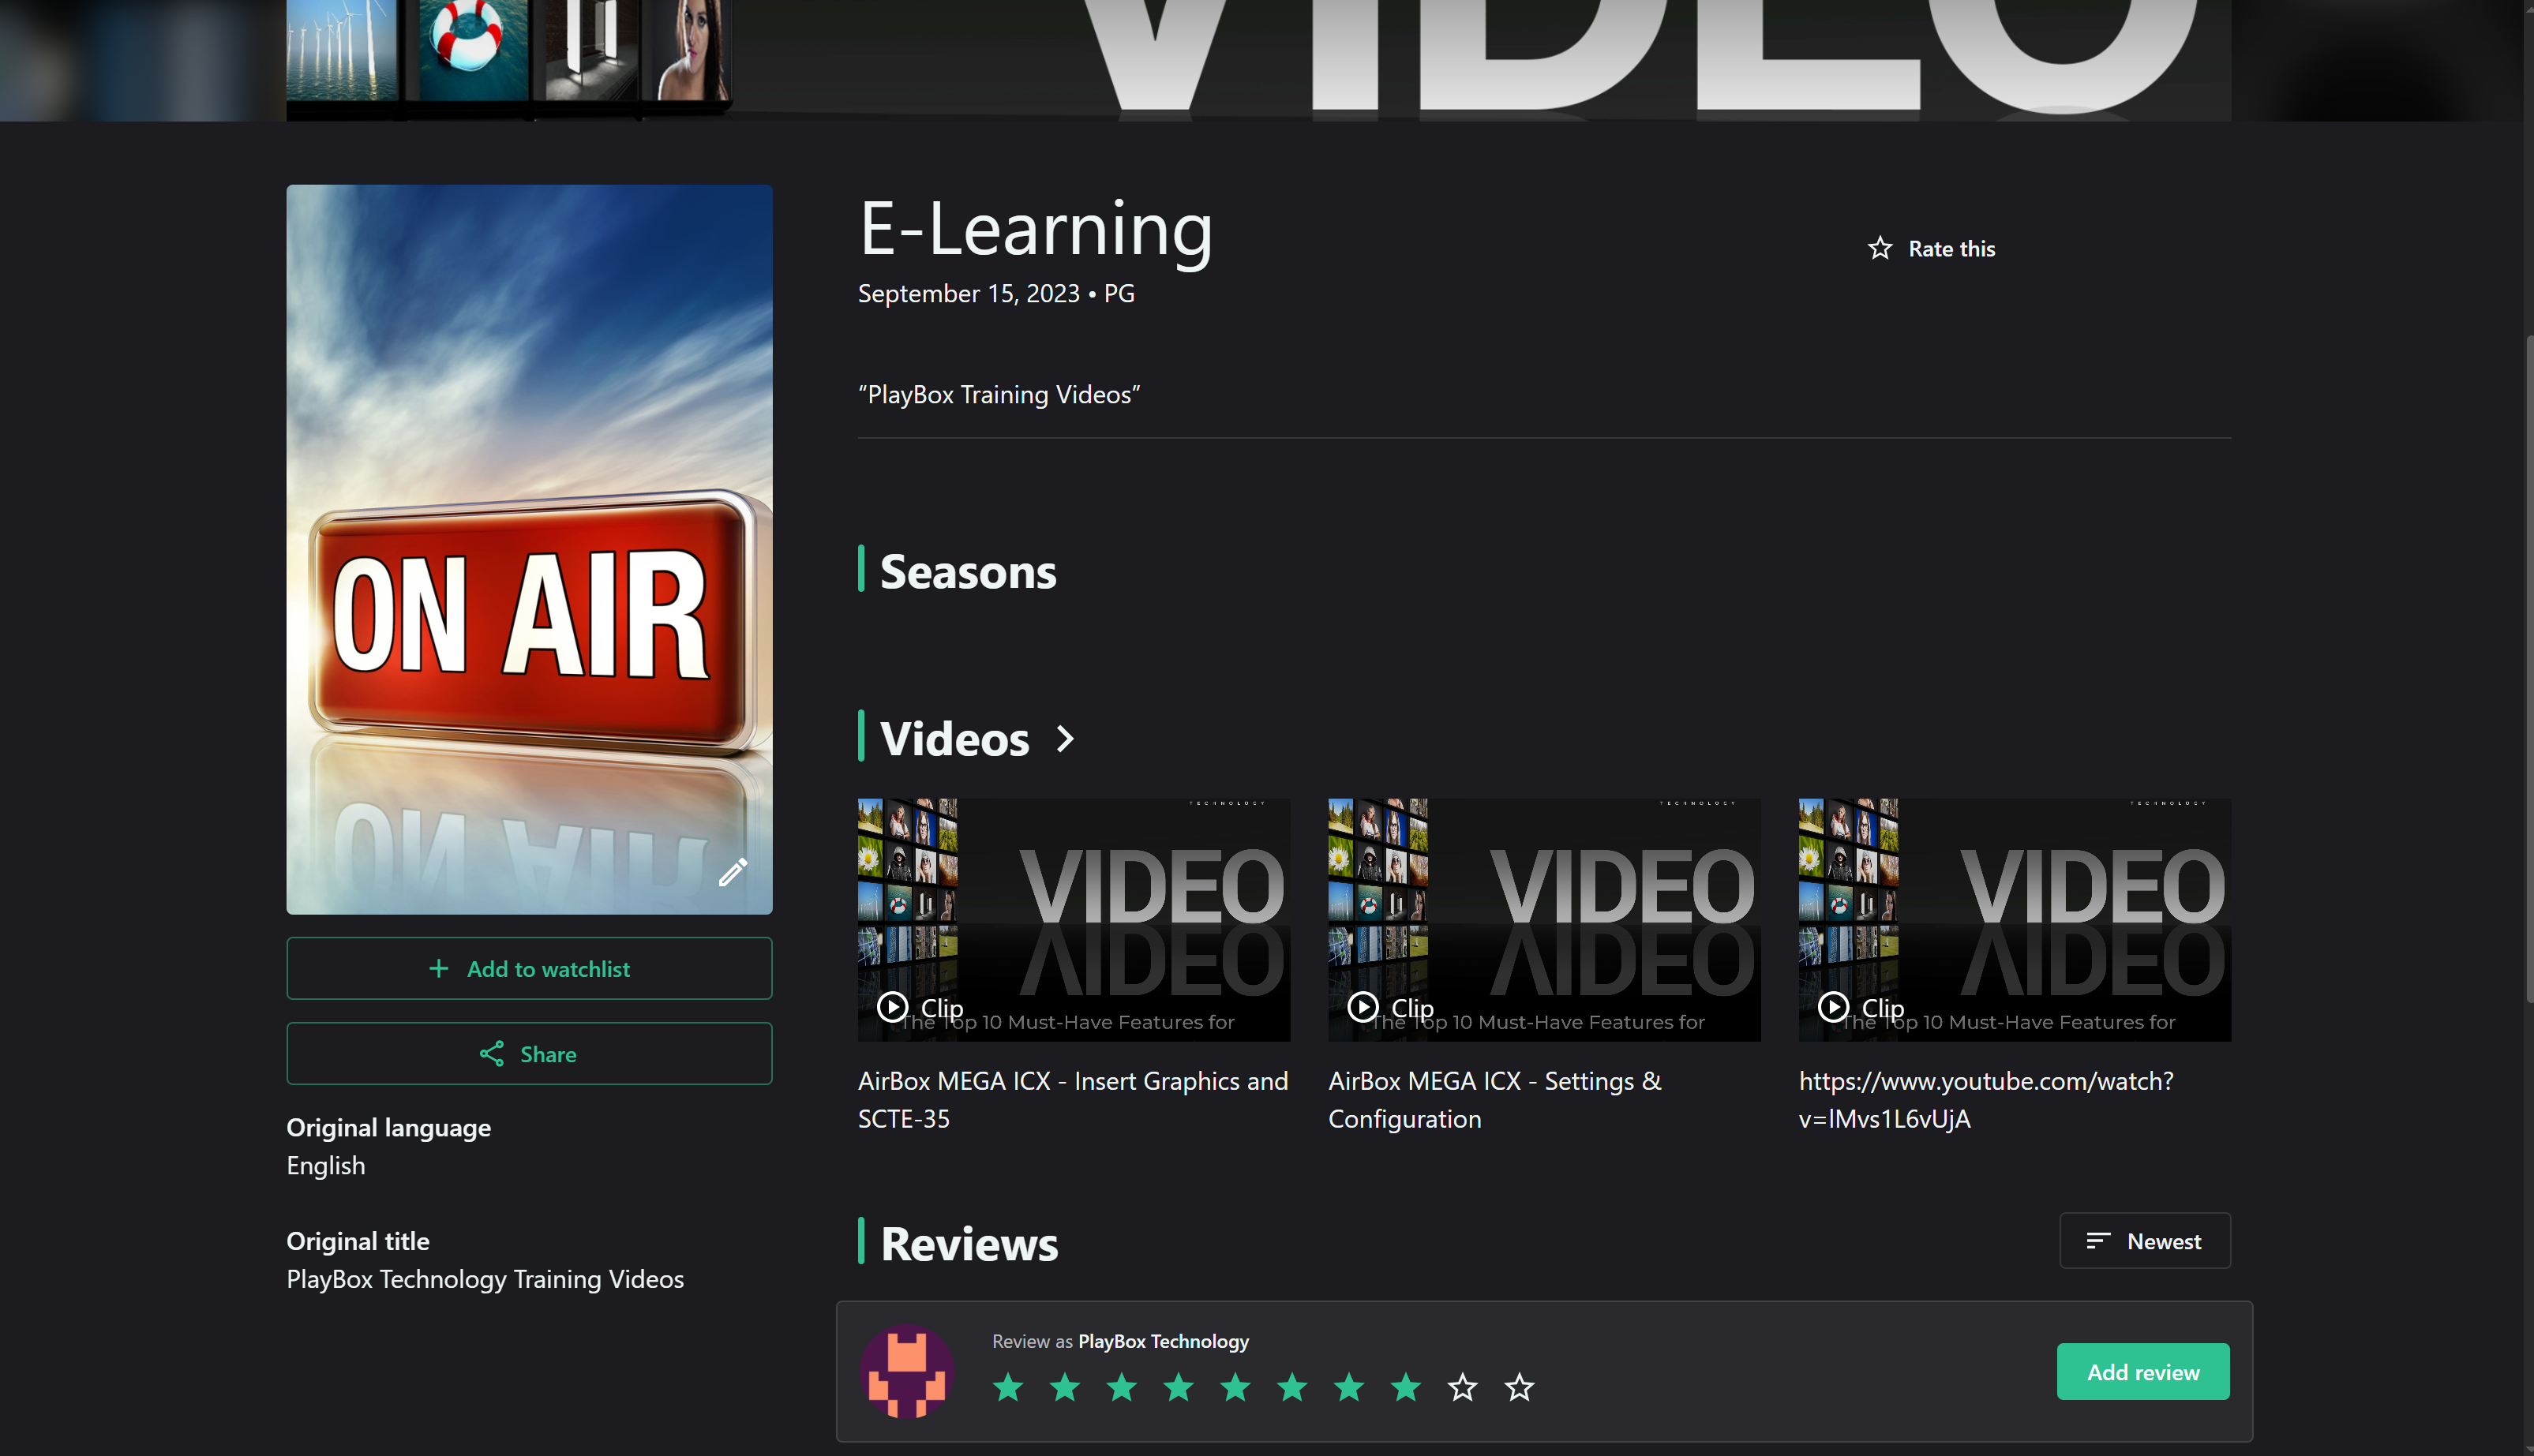
The main table displays comprehensive information about each title (thumbnail and title, release date, rating, page views, popularity, and last updated)

You can sort any column by clicking on the column header, allowing for customized organization of your content list.
You can use the checkbox in the header row to select/deselect all titles, facilitating bulk actions on your entire library.
You can click on a title row to view more details or edit the entry, providing quick access to in-depth information and editing options.
Clicking the small chart icon next to the 'Last Updated' column will take you to the individual analytics page for that title.
To modify a title's information, click the edit icon (pencil) at the end of the row, which will open the editing interface for that specific title. Make necessary changes in the edit form, ensuring all information is accurate and up-to-date. Save your modifications, which will immediately update the title information across your platform.
Adding a New Title:
1. Click on the button Add title in the right side
2. Upload poster and backdrop images:
High-quality images are crucial for attracting user attention. Consider implementing image optimization to ensure fast load times without sacrificing quality.
Recommended size:
Poster: 1080 pixels by 1920 pixels to ensure high resolution.
Backdrop: 1920 pixels by 1080 pixels to fit standard screen resolutions.
3. Enter title name, original title, tagline, and overview:
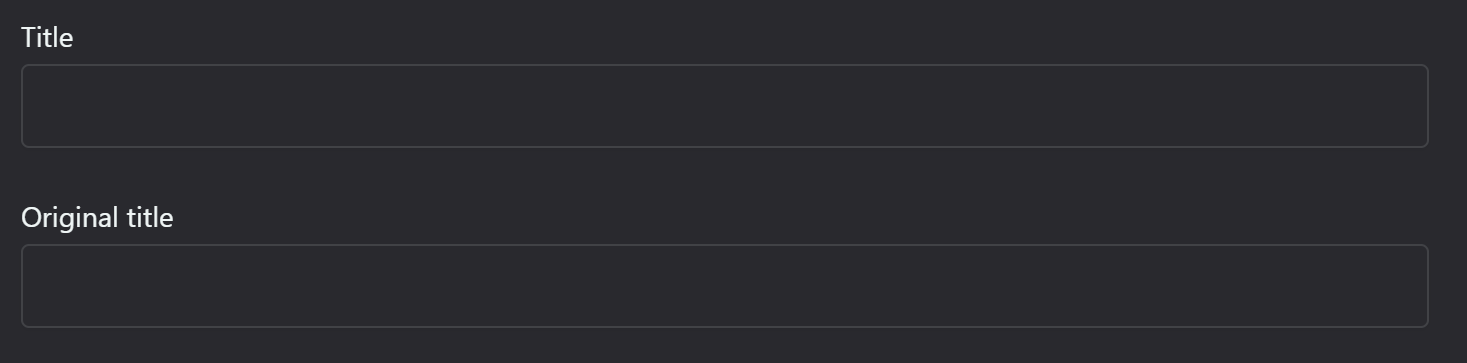
These elements are key for SEO and helping users decide what to watch. Consider implementing character limits and providing writing guidelines to ensure consistency.
4. Specify if it's part of a series: This helps with content organization and user navigation.
Consider implementing an interface for managing series, seasons, and episodes efficiently. You might want to provide options for displaying related content or next episodes prominently.
5. Set release date, runtime, age certification, budget, revenue, popularity, and language:
These metadata fields enhance search and filtering capabilities. Consider integrating with external databases to auto-fill some of this information. You might want to implement a system for users to report inaccuracies in this data.
7. In the case of series, you can edit or add a new season and episodes.

To edit a season, click on the Edit button and to add a new season, press on Add season button
To edit a season, click on the Edit button and to add a new season, press on Add season button
For each new season, you need to add a new episodes by clicking on the button Add episode.
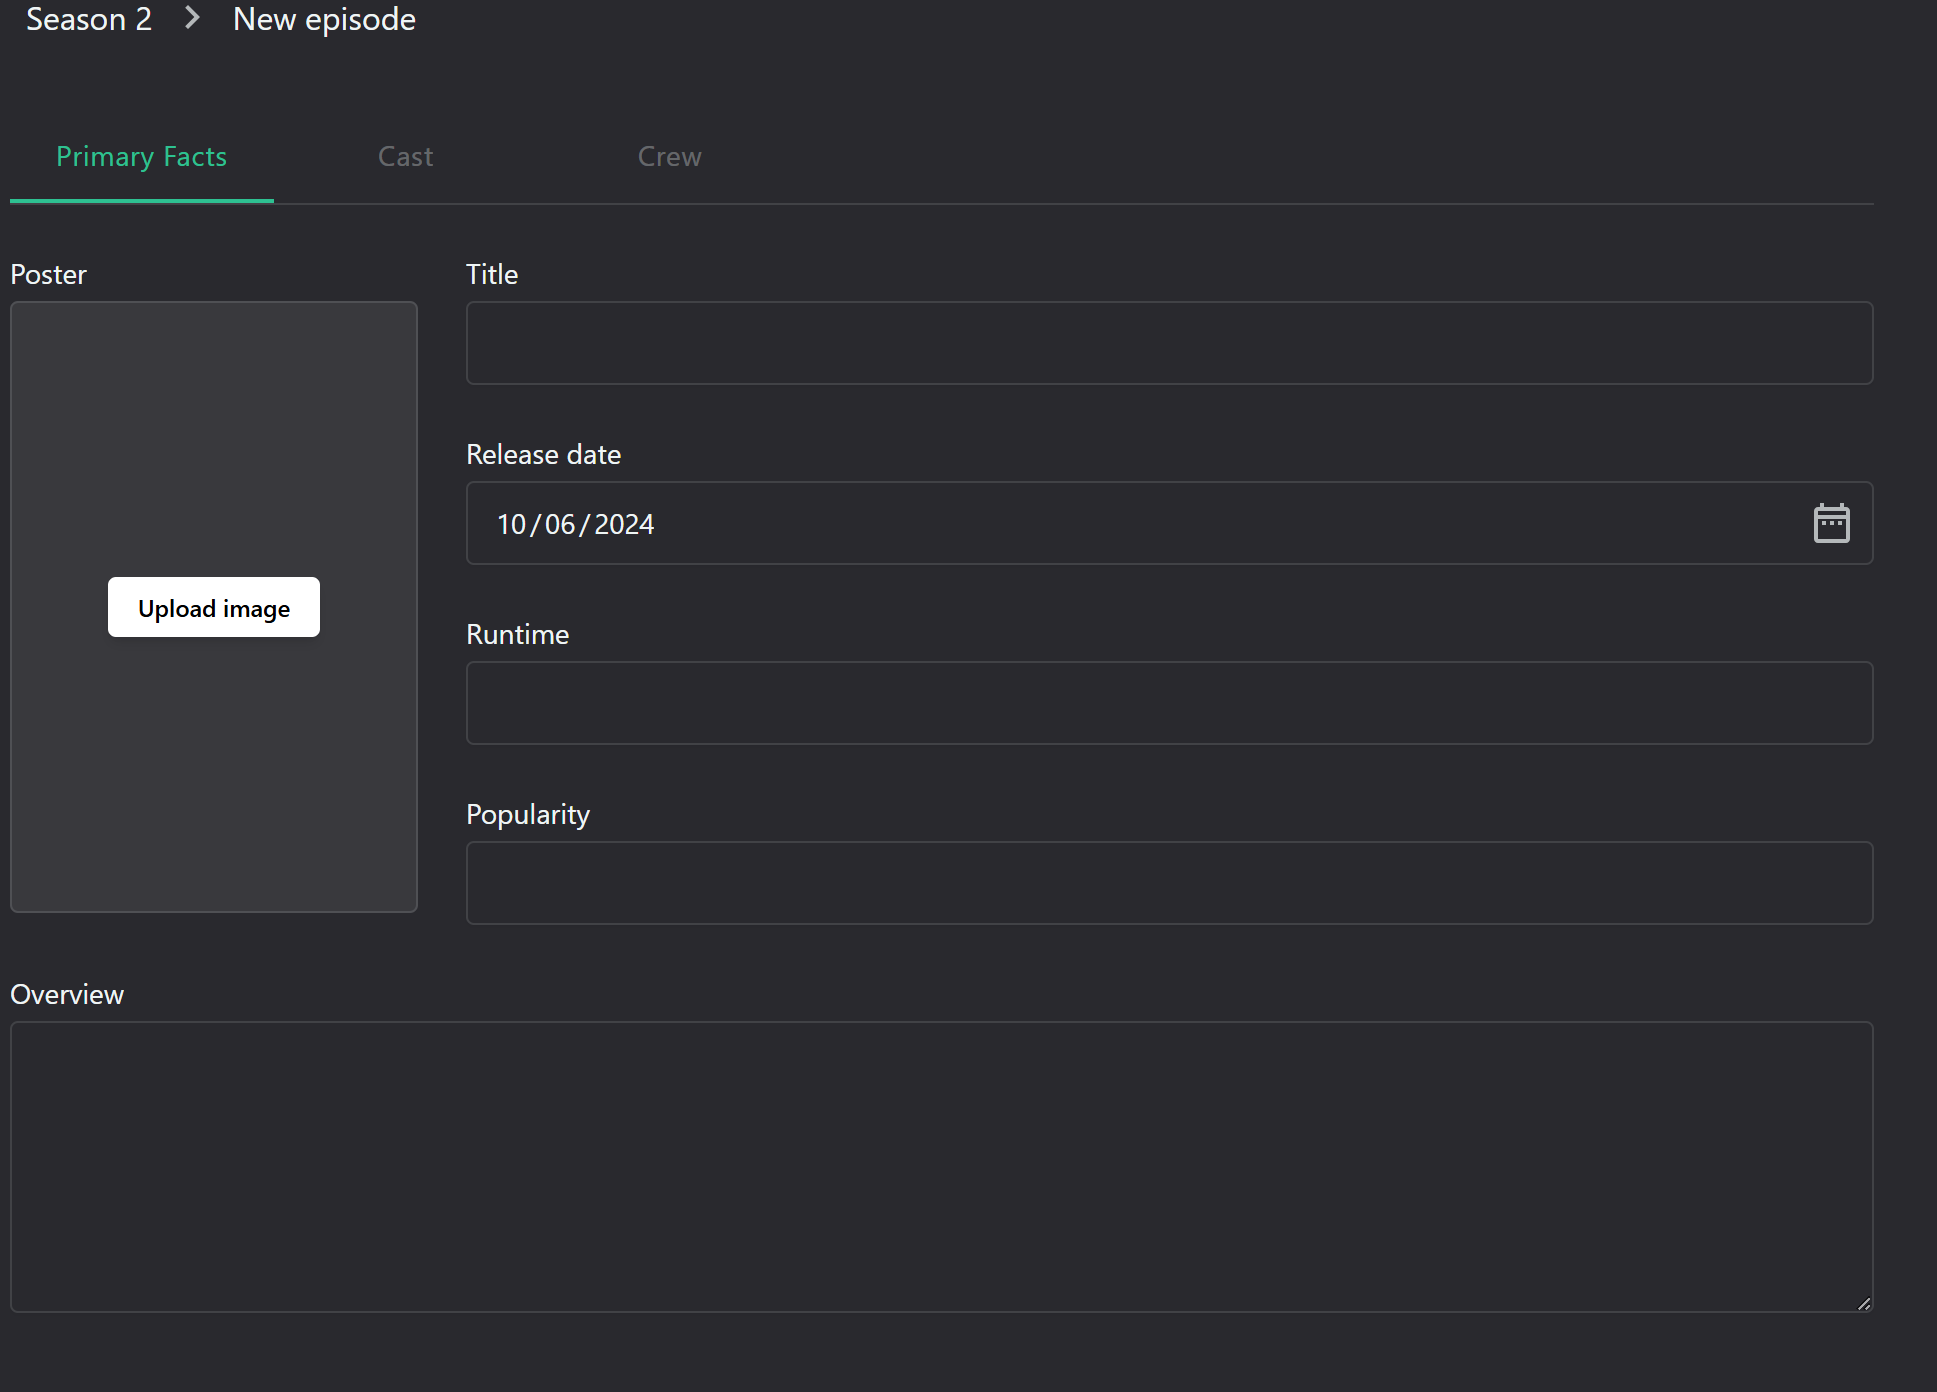
Here are the key elements of that dialog window:
Primary Facts: Basic information about the series, such as title, release date, runtime, popularity, overview and poster image.
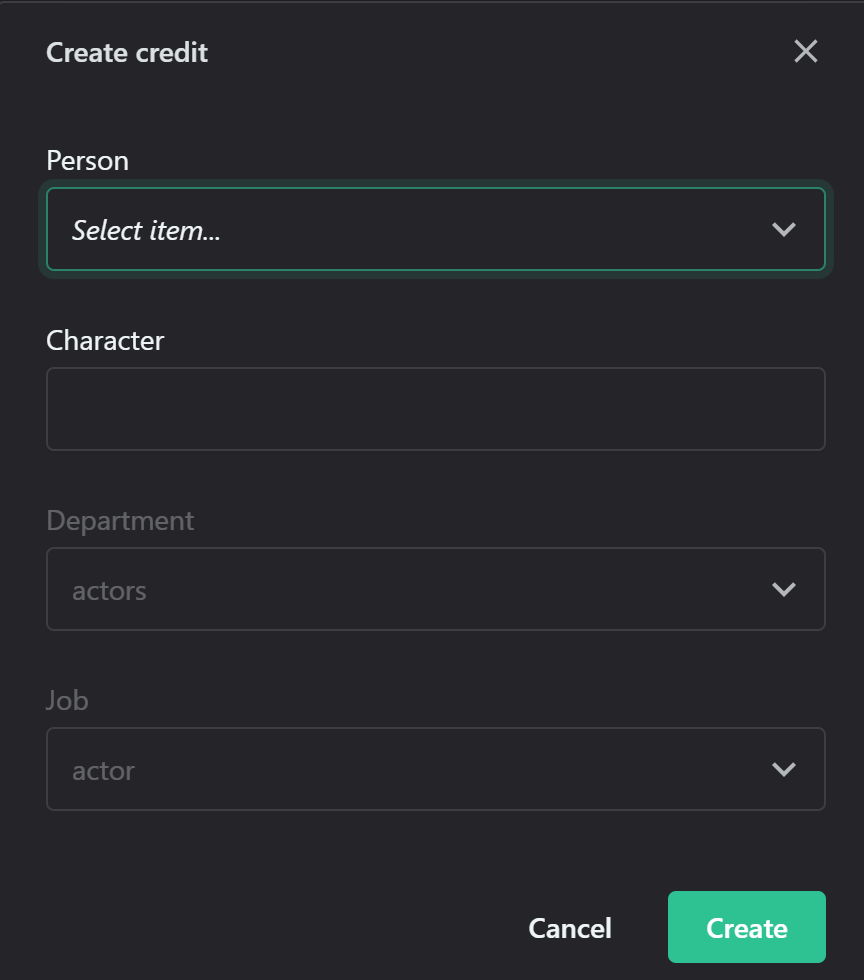
Regular Cast: Lists the names of the regular cast members, their role/character and search functionality.

To add a new cast member, click on Add credit button and select the actor's name and what character they play.
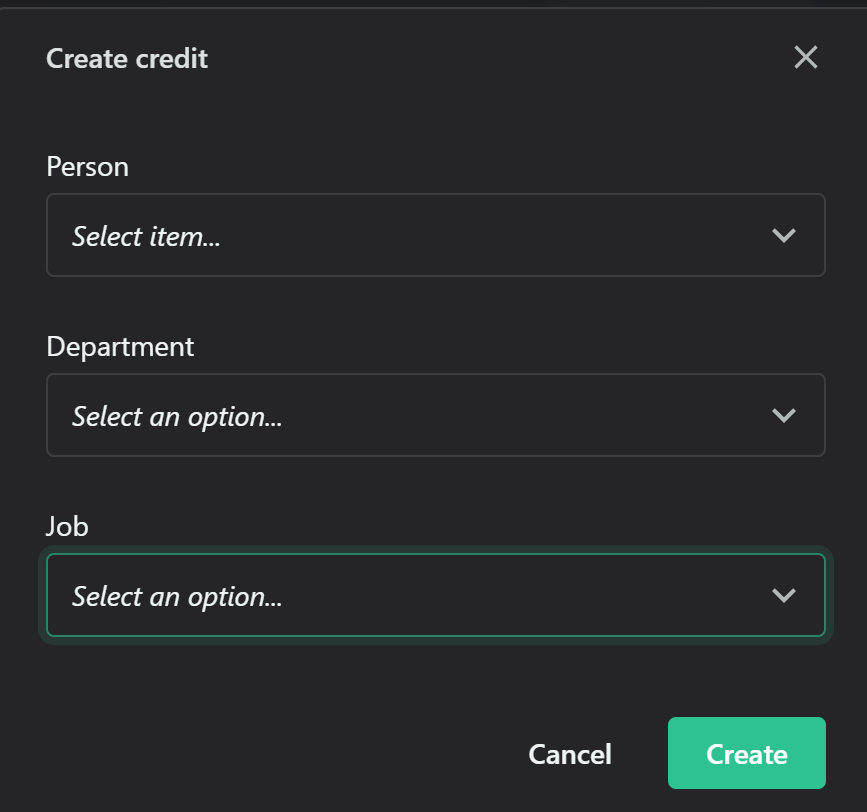
Regular Crew: Lists the names of the regular crew members, their department, their job and a search functionality.
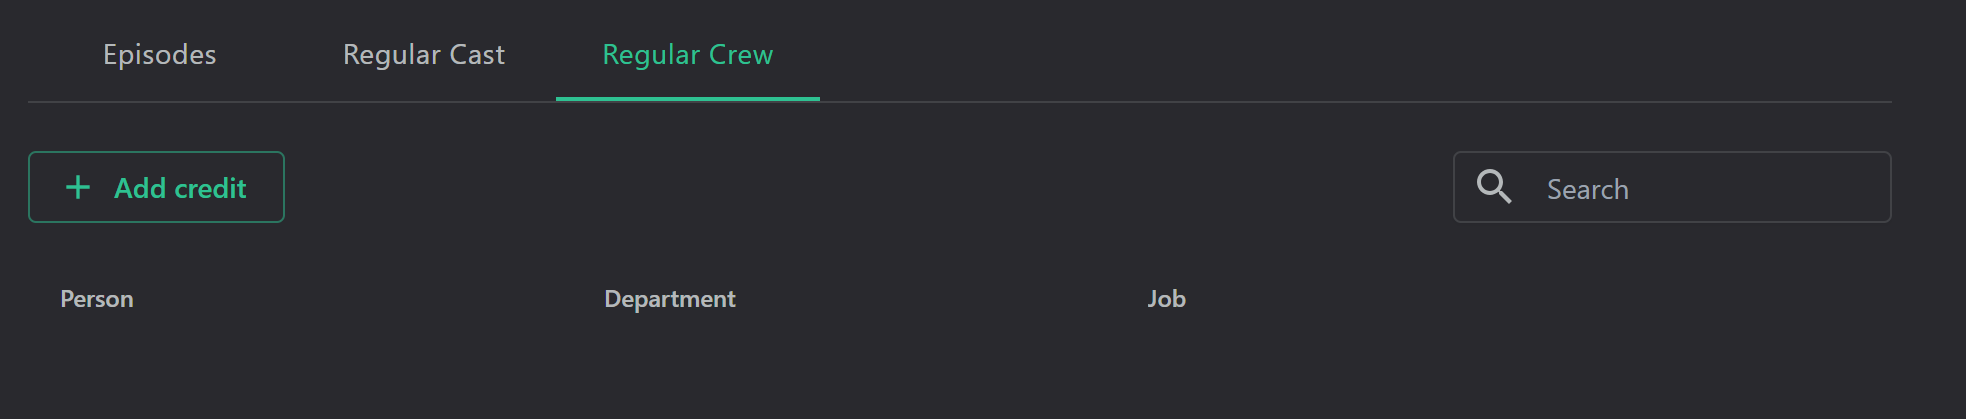
Regular Crew: Lists the names of the regular crew members, their department, their job and a search functionality.
To add a new crew member, click on Add credit button and define the name of the person, their department and their job
8. Add additional images in the images subsection:
Multiple images can enhance the title's appeal and provide more context. Consider implementing a gallery feature for users to browse these images easily. You might want to allow for tagging of images (e.g., "behind the scenes", "character poster") for better organization.
9. Add the videos related to this Title:
This section contains all the videos, associated with the title.
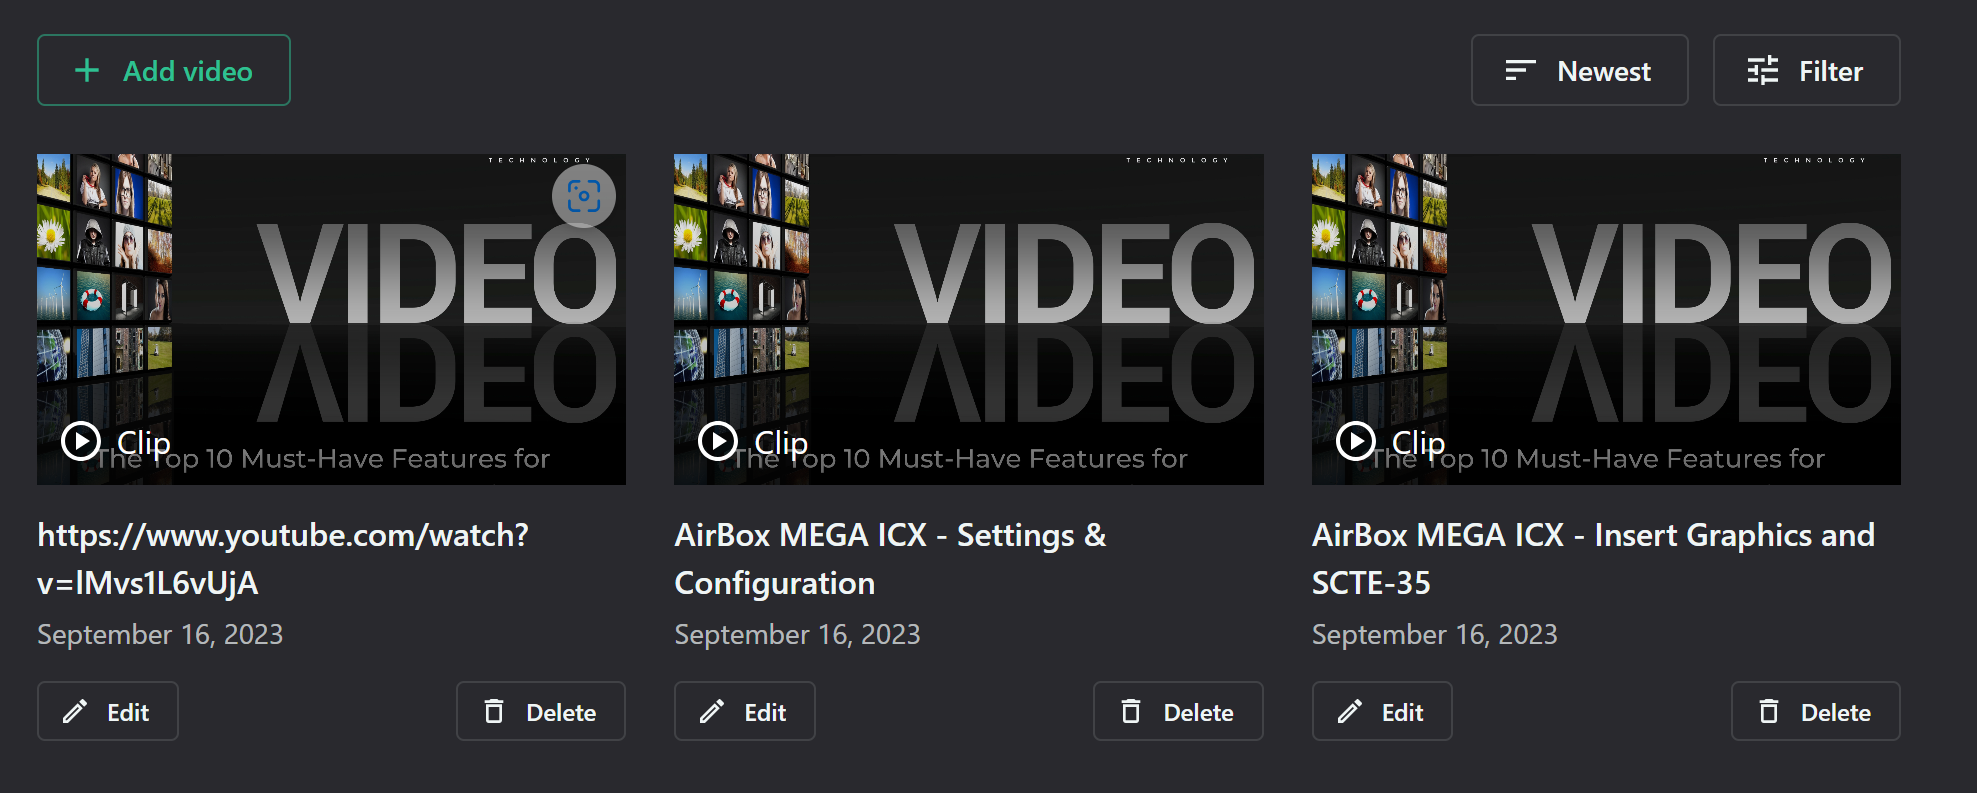
The videos can be arranged by several different categories (newest, oldest, most viewed, most reported, seasons and curated)
The videos can be filtered by various categories:

user (from the list of the registered users on the platform),
status (approved or not approved),
origin (local or external hosting),
type (embedded, direct link, stream or remote link),
quality (SD, HD, Stream or remote link),
category (full video or episode, trailer, teaser, clip, featurette, behind the scenes),
date of creation,
last update
To edit a video, click on the Edit button under the thumbnail of the video
Detailed instructions for adding a new video can be found in the 'Videos' section.
10. Add the names of the cast members:
This section categorises the names of the main cast by person and character.
This section categorises the names of the main cast by person and character.
To add a new crew members, click on Add credit button and enter their name and the character they played.
11. Add the names of the crew members:
This section lists the crew members by name, department and job category.
To add a new crew member, click on Add credit button and enter the name, department and job function of the person.
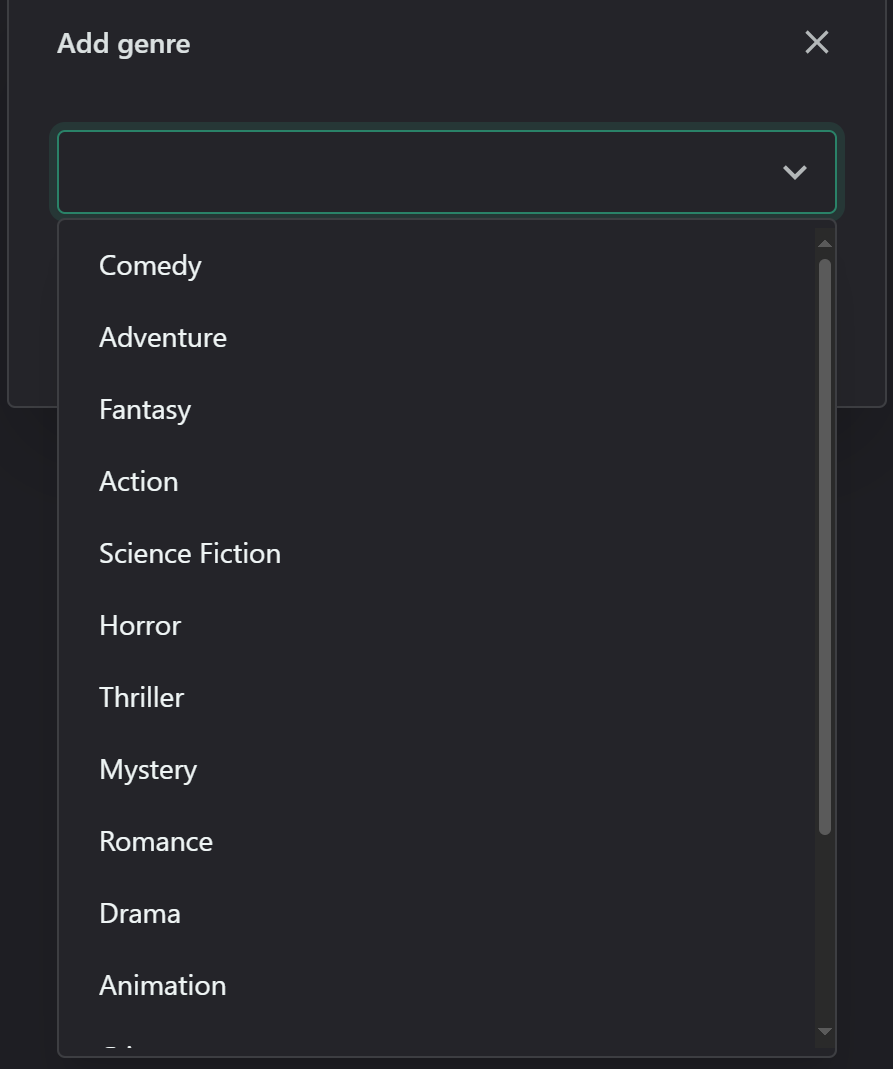
12. Add the genres of the title
The genres in the title section are listed by ID and Display name
To add a new genre, click on Add genre button and select from the drop down menu of the dialog window
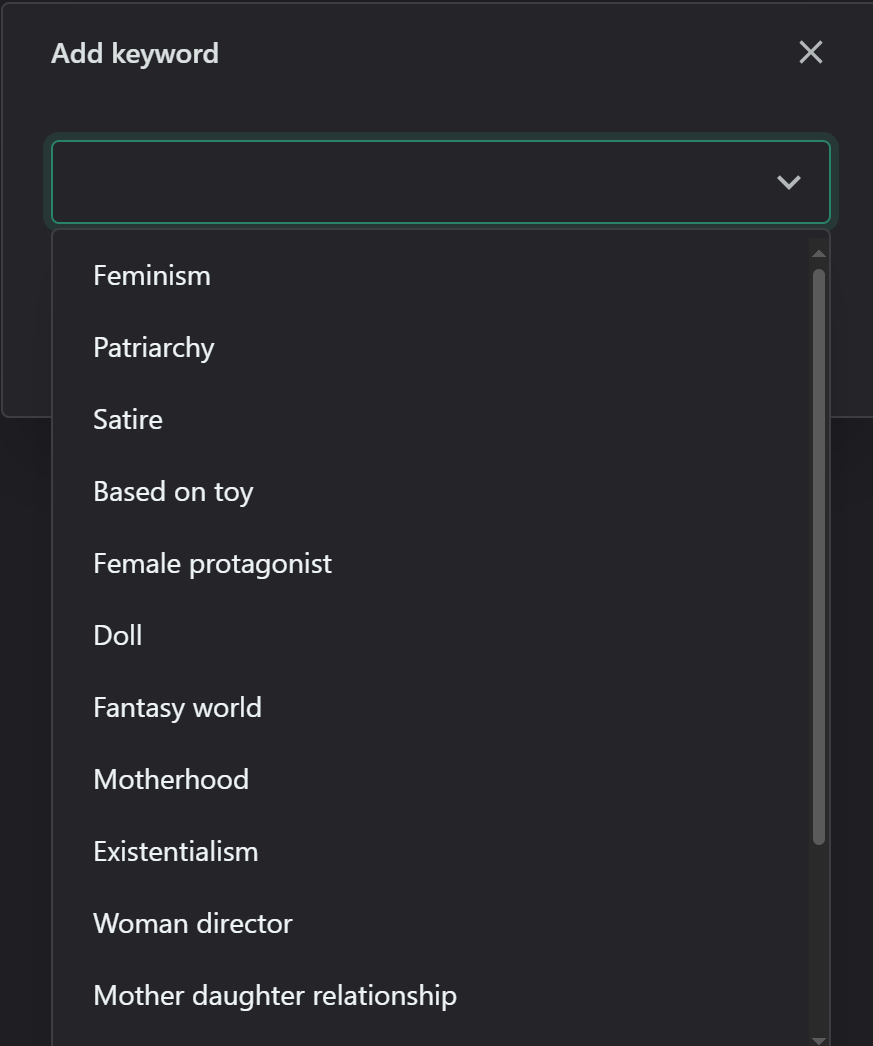
13. Add the main keywords
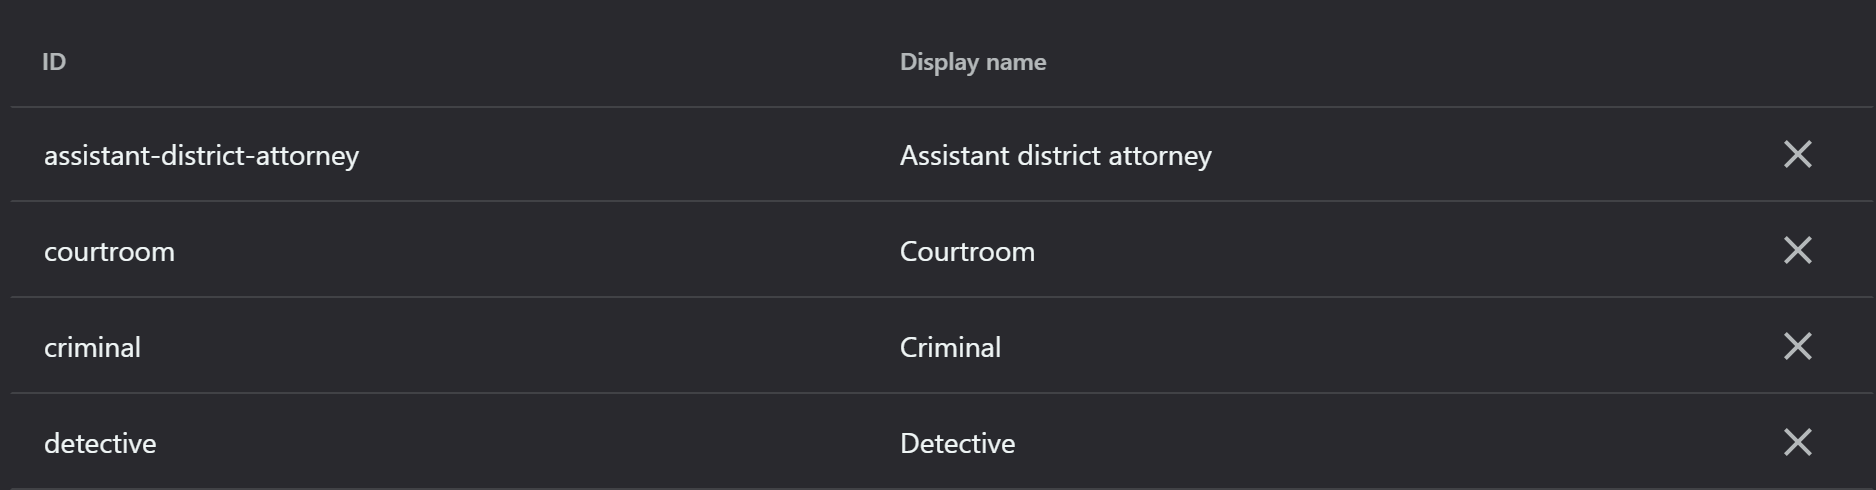

The keywords for the specific title section are also listed by ID and Display name
To add new keywords, click on Add keyword button, and select the desired words from the drop down menu in the dialog box
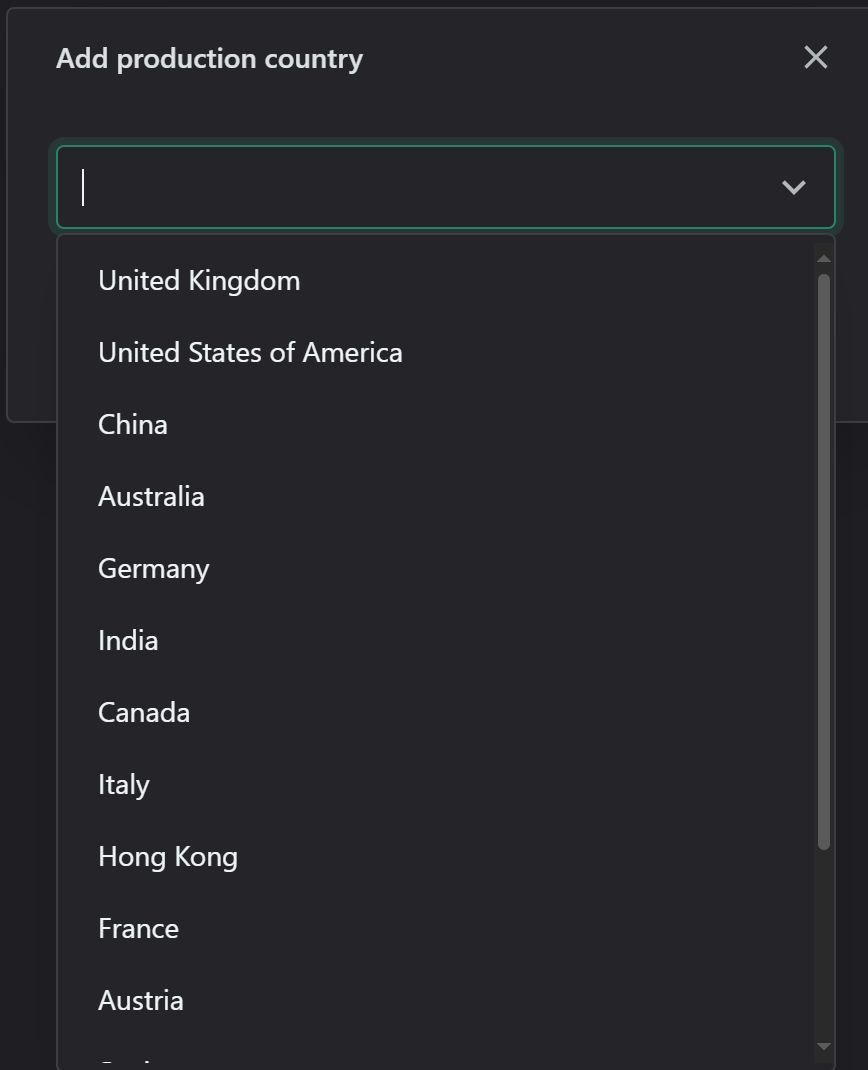
14. Add the countries, associated with the title
This section specifies the production country/ies of the title by ID and Display name
New countries are added with the help of Add production country button and the country is selected from the drop down menu.
15. Check any reviews, related to the title
The review section will display all the reviews written for that title:
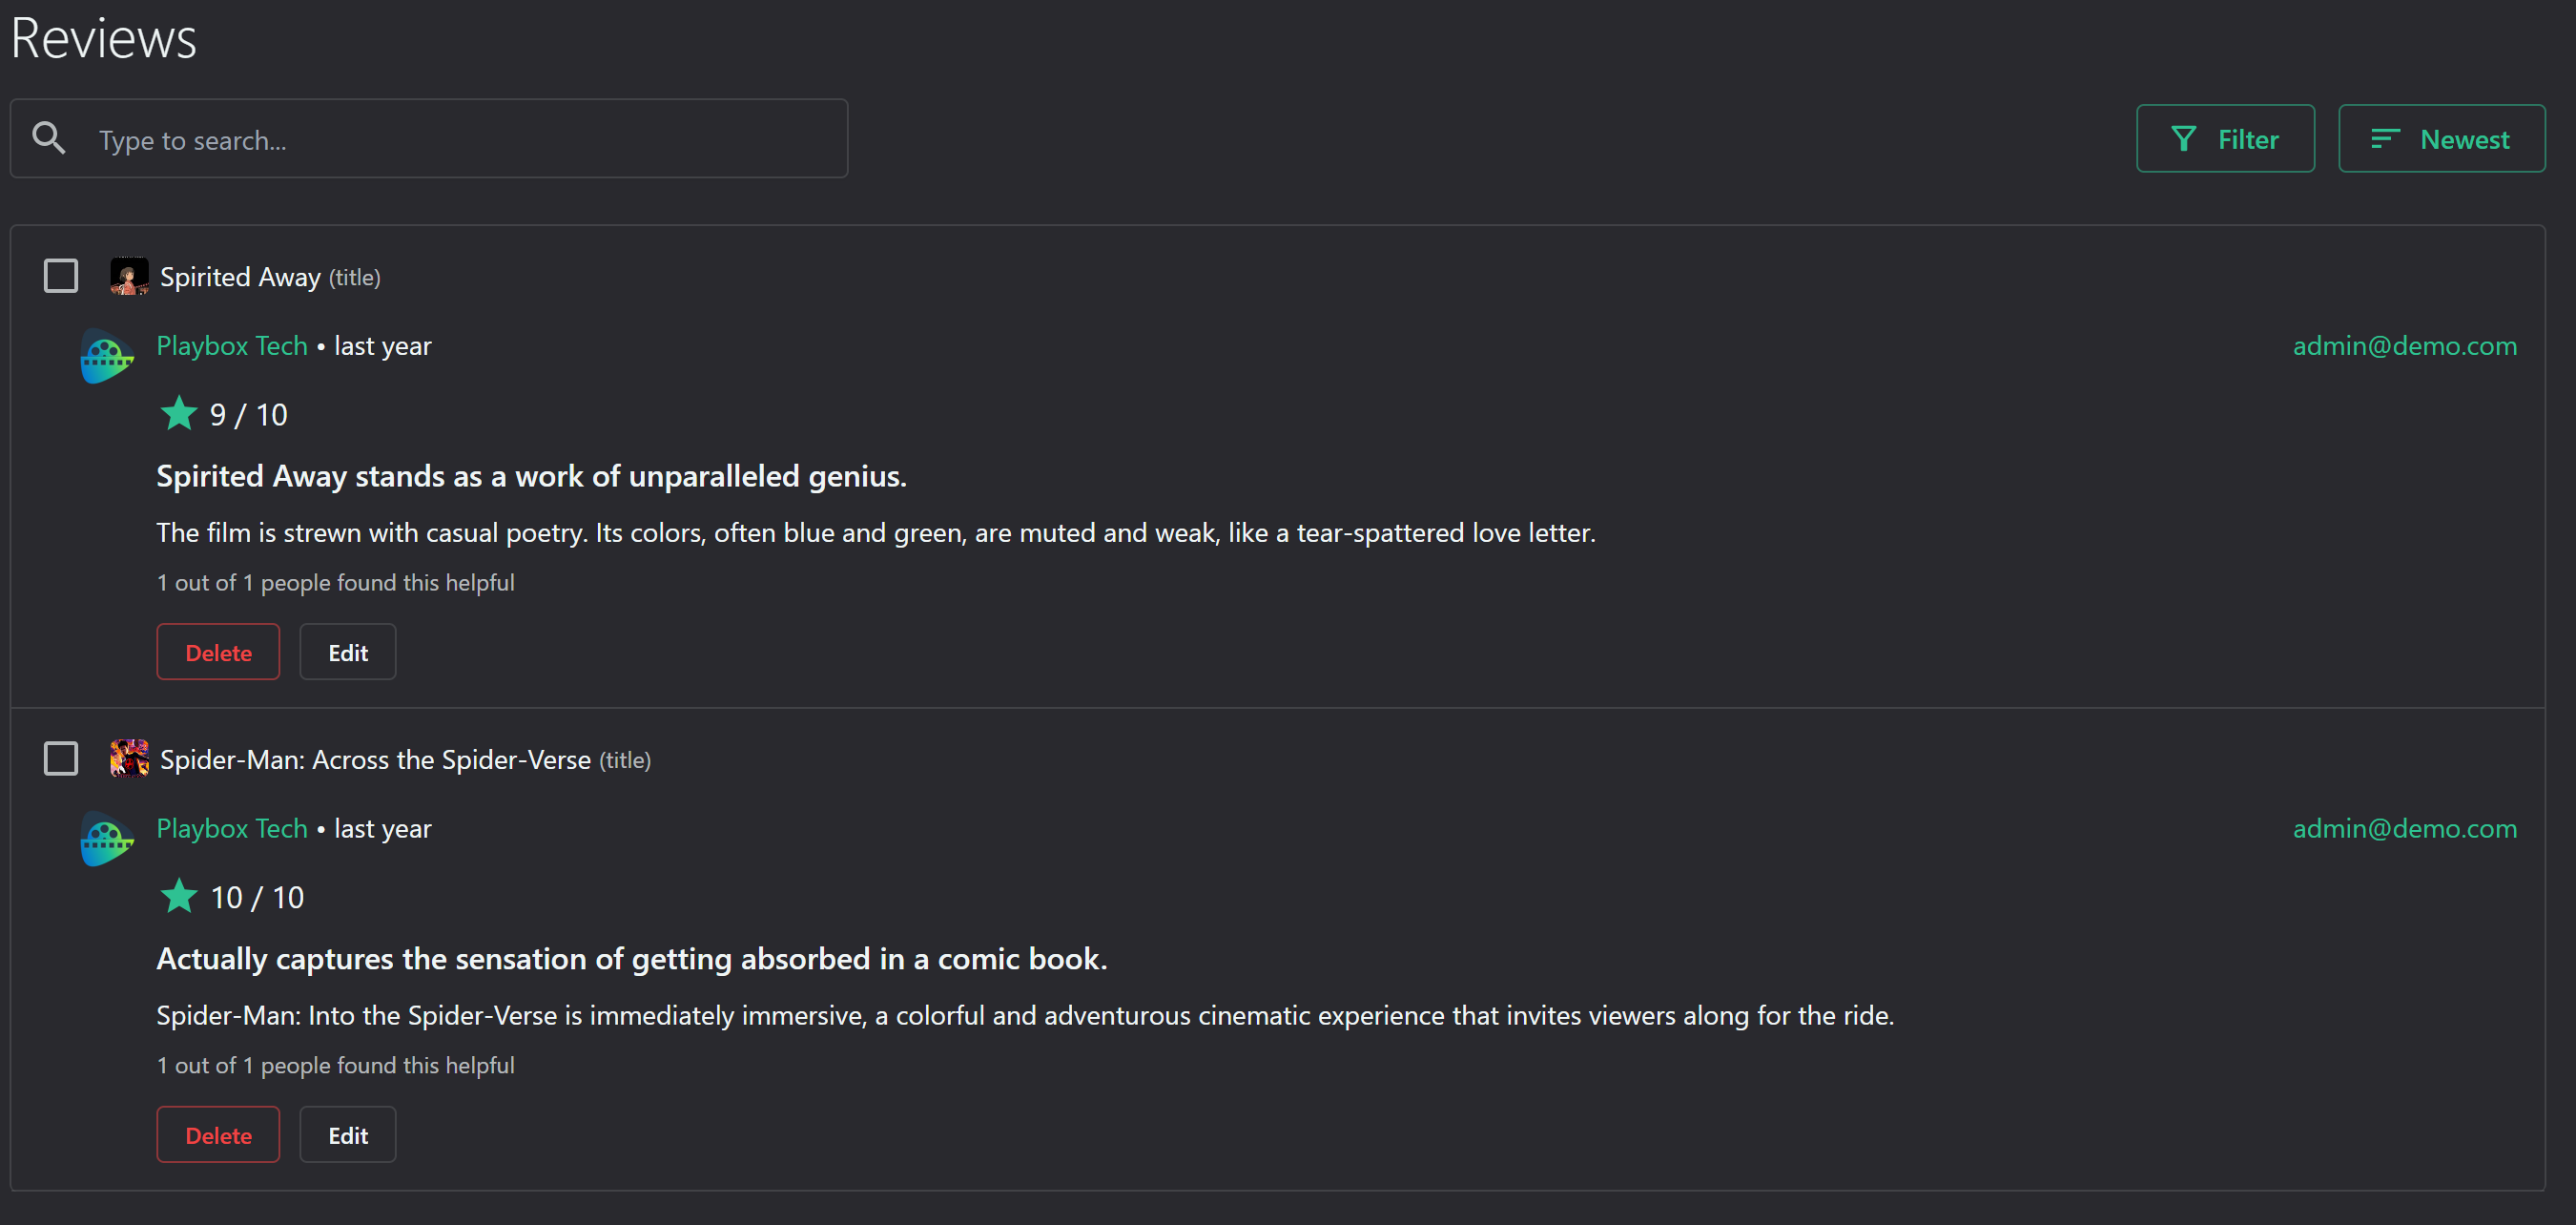
They can be filtered by user, title, score, helpful and unhelpful count, date of creation and last update
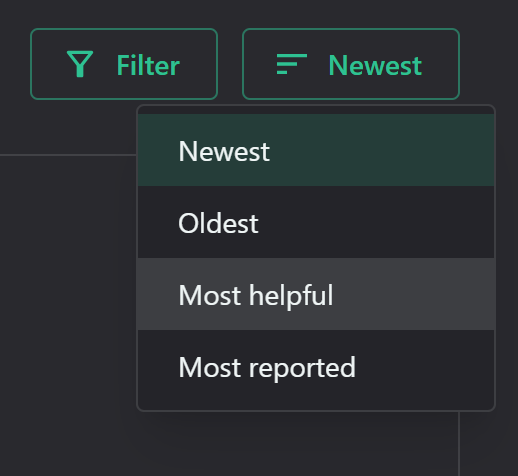
and arranged by newest, oldest, most helpful and most reported
16. Check any reviews, related to the title
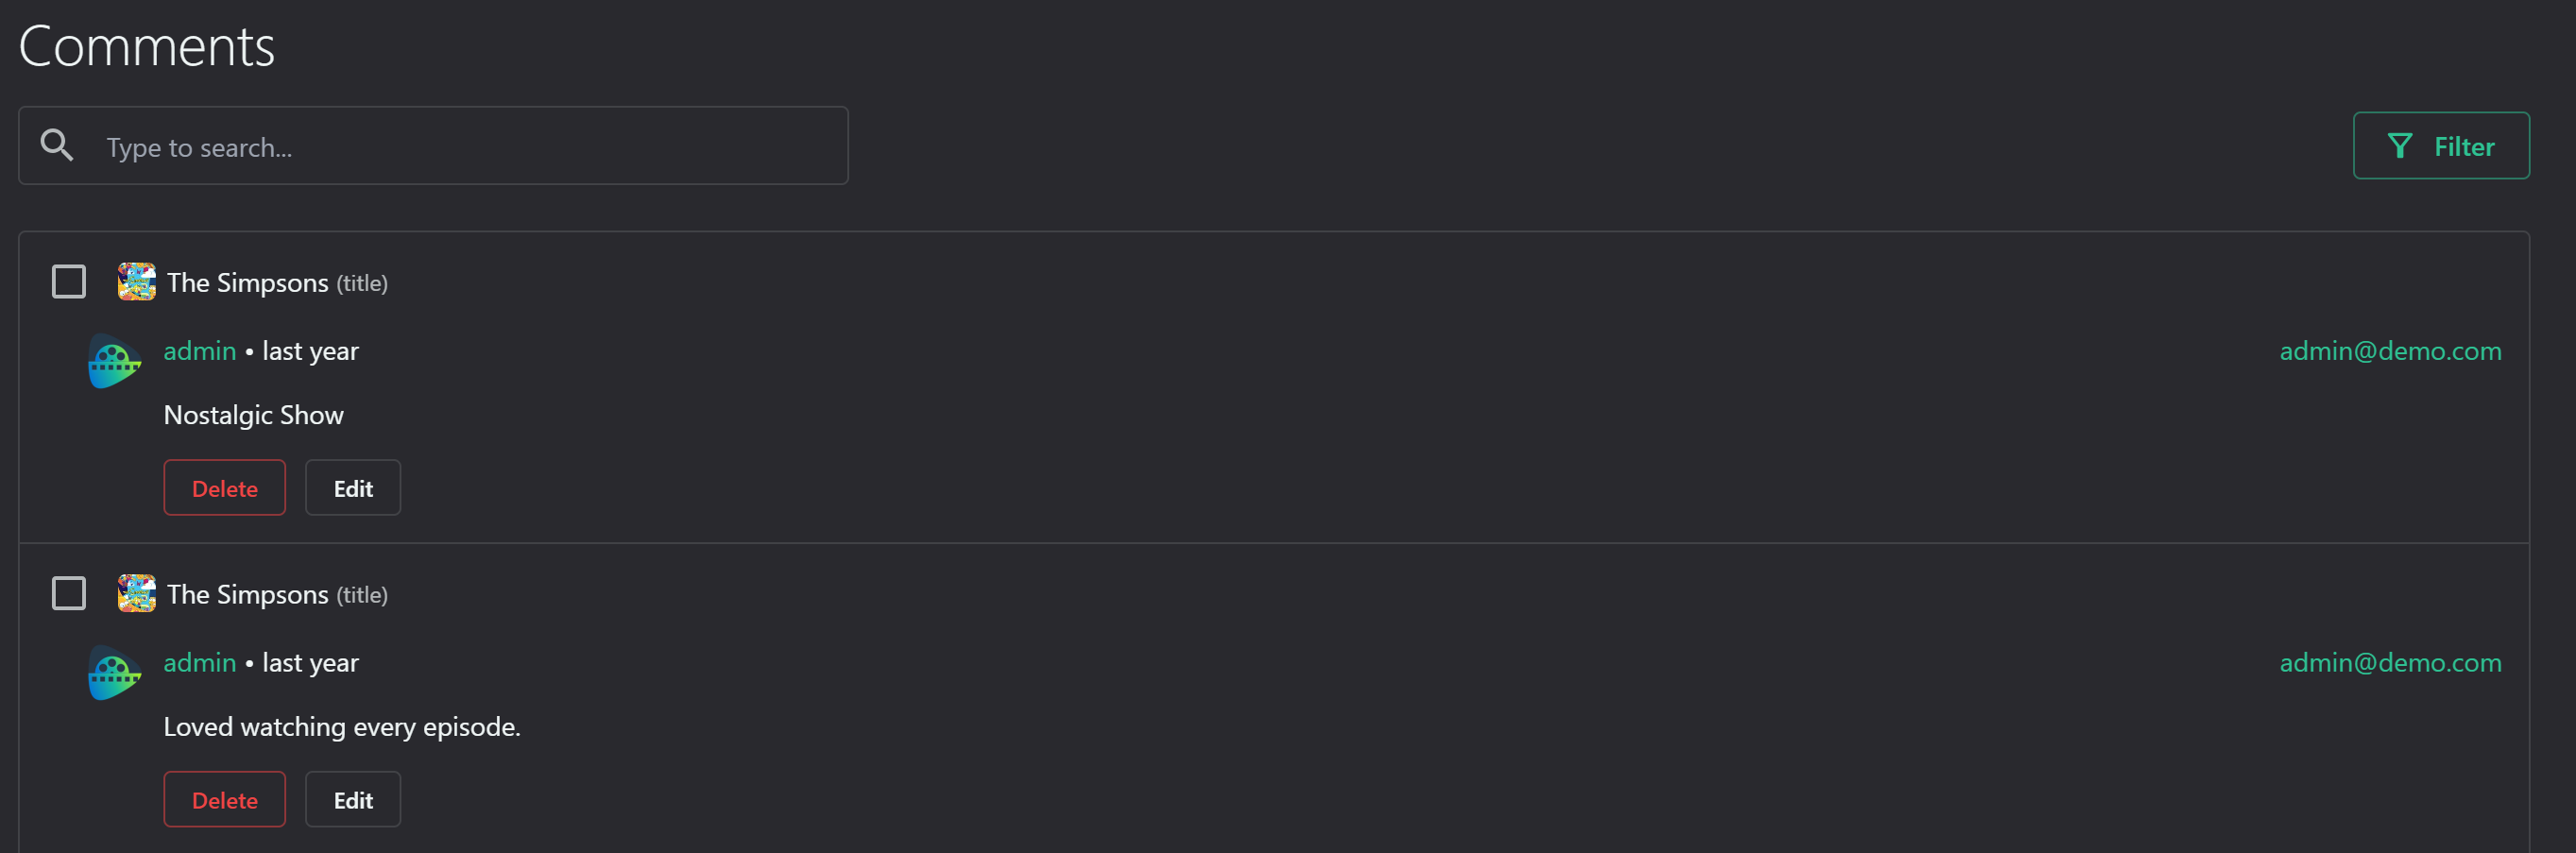
This section contains a list with all the comments made for this title
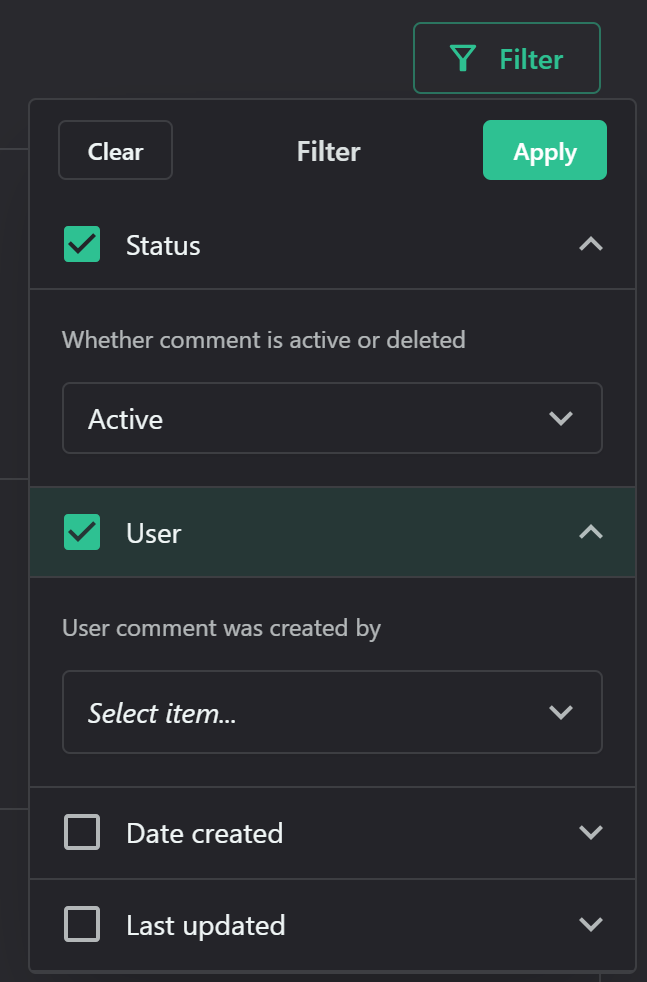
They can be filtered by four categories: status (active or deleted), user, date of creation and last update.
Related Articles
Creating a list
To create a new list, you can click on Your lists - OTT Stream section and follow these steps: 1. Click on "New List" button: 2. Fill in the name and description 3. Choose list type - whether titles (movies or series) or people 4. Select display ...Creating a Sequence
Click on the Sequence icon in the object palette and draw a rectangle in the work area. Load a sequence of .tga files. Select a file to preview it in the right. Invert the alpha, if necessary, and click OK.Creating Browser objects
Select the browser icon in the Object palette and draw a rectangle in the work area. Enter the URL to open and click OK You can type a new address in the last toolbar above. Press <Enter> to apply. NOTE: If the page contains links that open in ...Creating Screen Capture Object
Select the browser icon in the Object palette and draw a rectangle in the work area; Drag the Screen Capture dialog to the part of the screen you would like to capture; TIP(!) Use the buttons in the lower left corner of the Screen Capture window to ...Creating a Shape Object
Select the shape icon in the Object palette and draw a rectangle in the work area. Change the shape properties using the last toolbar above.